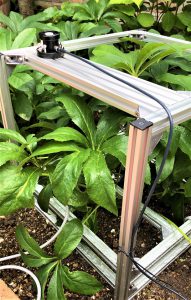
Plant Intensive Observation Frame Kit
This frame kit useful to measure herbaceous plant for long term.
Very light and easy to carry
Just install legs to 3 frames and ready to use.
The Greatest Merit :
Can be left it for long time!
Only go to site when you want to collect data!
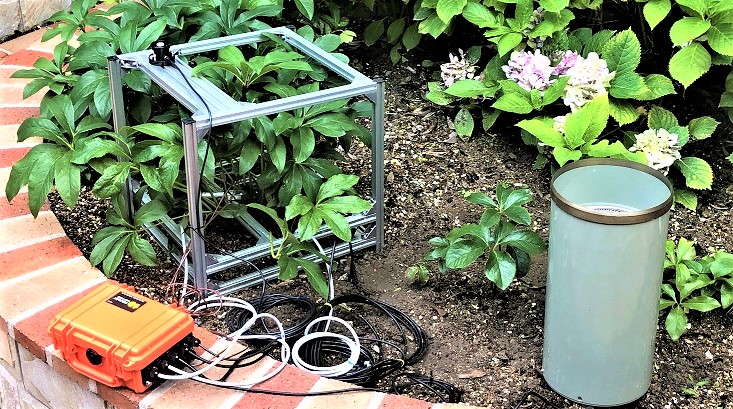
Sensors used for above picture are listed below table.
Interval time 10 min and battery life is 284 days when using Data Logger MIJ01.
| Measuring all of below | Sensor | Price |
| Plant Intensive observation kit | POF-Kit (This is not sensor) | ¥30,000 |
| Stem | MIJ-02 LMS | ¥60,000 |
| Root | MIJ-02 LMS R Proto (Still in developing) | ¥60,000 |
| Light (PAR or LAI) | MIJ14 PARType2/K2 (MIJ15 LAI/K2can be set instead of MIJ14 PAR) |
¥70,000 (LAI: ¥190,000) |
| Soil oxygen | MIJ-03 Type2 | ¥55,800 |
| Water potential and temperature | SM150T | ¥45,000 |
| Leaf temperature | T typed thermocouple 0.32 | ¥3000 |
| Air temperature around leaf | T typed thermocouple 0.32 | ¥3000 |
| Rain gage | Yokogawa 0.5mm | ¥155,000 |
| Data logger | Data Logger MIJ-01, Waterproof BOXCG9 | ¥155,000 |
| Total:¥631,800 |
Measured Data
Sample: Christmas rose
Sample size: Stem:5.05mm Root:0.42mm
Sensors: see above table
Memo:
7/14 10:00am: LM 0.1N& LMS0.05N changed spring setting for both LM・LMS to 0.3N
2020.07.09 to 2020. 07.13: Measured Data
植物集中観察キットとセンサーの取り付け方
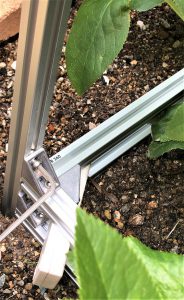
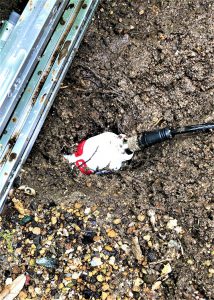
1.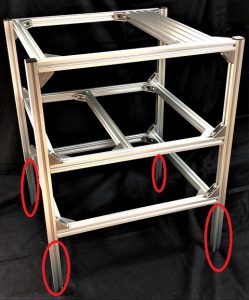 |
Please install bottom flame until touch to ground. Red circled part must be installed into ground. |
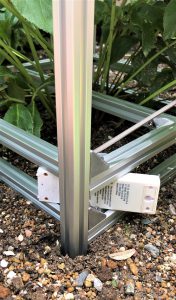
2. |
To stabilize the frame, hit for corners with hammer or other tool to embed legs. After embedding, return the plant to its original state as much as possible so that stress will not apply to plant. |
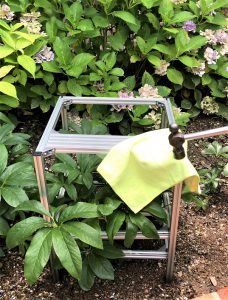
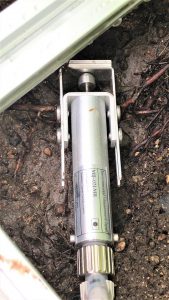
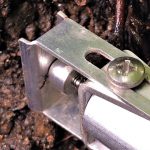
3.  |
Fix the stage to the height of the measurement place of sample. To fix them in parallel, insert something like the one in the figure and temporarily fix it in four places. When tightening, do the same process. |
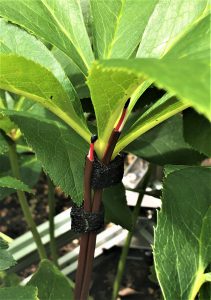
4.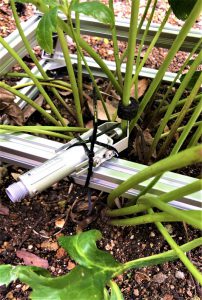 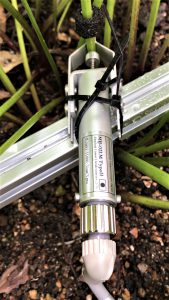 |
Attach the sensor to the sensor position adjustment bar on the middle stage. Attach the LMS stay to the stem with the Epto sealar and fix it. Put the main body in the stay and fix the LMS main body to the bar with cable tie. For LMS installation please click here * Be sure to give initial tension when installing LMS |
5.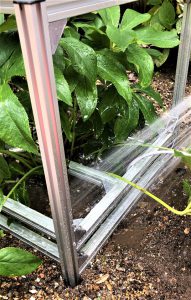 |
Next, install the sensors to be buried. Use a watering can to make it easier to dig the soil. |
6.  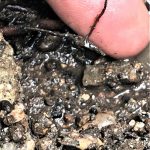 |
Since the root of the sample is measured, select the root of the desired size and insert the root as picture shown. Please make sure that the root is sandwiched and then bury it. *The one in the picture is in the prototype stage so currently under development. Please wait for a while until sales. |
7. 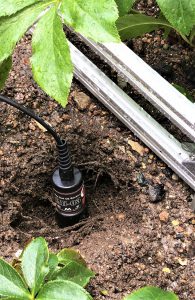 |
Bury the SM150T and MIJ03 as picture shown. For MIJ03, please embed vertically. |
8.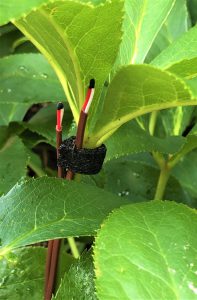  |
Attach thermocouples to measure leaf temperature and ambient temperature. At this time, for the thermocouple for leaf temperature, fix the stem and thermocouples with Eptsealer. For the ambient temperature please do not let thermocouples to touch the leaf but set near measure leaf. For this process also use Eptsealer to fix cable to the stem. |
9.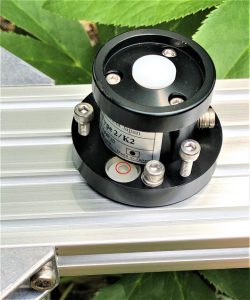  |
For the last step set the PAR sensor to the top stage. The PAR sensor has a level, so you can install it horizontally by adjusting sharped screws. For the cable please fix with cable tie as picture shown. |
10.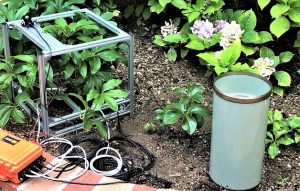 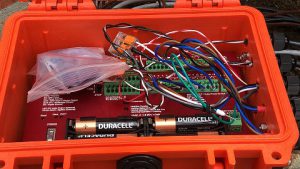 |
Do not forget to set the rain gage. This is significant point that please open the silica gel zipper when using the data logger. |